[c]
[/c]
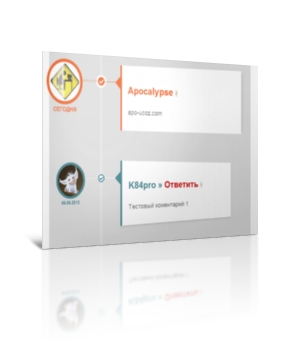
Уникальный вид комментариев выполнен в стиле 3D, отлично смотрится на любом дизайне. Вид комментариев полностью рабочий, отображается во всех браузерах одинаково и установка не займет у Вас много времени. Автор постарался на славу. Предлагаю посмотреть видео обзор этого вида комментариев для ucoz
[video]http://youtu.be/uzuIao-q99w[/video]
Установка:
В самый низ вашего css вставляйте:
[code]/*--ubutton-fix--*/
.myBtnLeft img, .myBtnRight img, .myBtnLeftA img, .myBtnRightA img, .myBtnRight + td input, .myBtnRightA + td input { display: block }
.myBtnCenter, .myBtnCenterA { line-height:19px !important }
.myBtnCont { height:19px; padding-bottom:0 !important }
@font-face {
font-family: 'fontawesome-selected';
src: url("/css/fontawesome-selected.eot");
src:
url("/css/fontawesome-selected.eot?#iefix") format('embedded-opentype'),
url("/css/fontawesome-selected.woff") format('woff'),
url("/css/fontawesome-selected.ttf") format('truetype'),
url("/css/fontawesome-selected.svg#fontawesome-selected") format('svg');
font-weight: normal;
font-style: normal;
}
.timeline {
position: relative;
list-style-type: none;
padding: 30px 0 50px 0;
font-family: 'Gorditas', Arial, sans-serif;
width:650px;
background:#ddd
}
.timeline:before {
content: '';
position: absolute;
width: 5px;
height: 100%;
top: 0;
left: 165px;
background: url(data:image/png;base64,iVBORw0KGgoAAAANSUhEUgAAAAUAAAAFCAYAAACNbyblAAAAJUlEQVQIW2NkQAP/gYARWQwkAOLDBeECjEAAkkEWAKtEFwAJAgAZEBP+oM1IkwAAAABJRU5ErkJggg==);
color:#aaa
}
.event {
position: relative;
margin-bottom: 80px;
padding-right: 40px;
}
.thumb {
position: absolute;
width: 100px;
height: 100px;
box-shadow:
0 0 0 8px rgba(65,131,142,1),
0 1px 1px rgba(255,255,255,0.5);
background-repeat: no-repeat;
border-radius: 50%;
-webkit-transform: scale(0.8) translateX(24px);
-moz-transform: scale(0.8) translateX(24px);
-o-transform: scale(0.8) translateX(24px);
-ms-transform: scale(0.8) translateX(24px);
transform: scale(0.8) translateX(24px);
}
.thumb:before {
content: '';
position: absolute;
height: 8px;
z-index: -1;
background: transparent url(data:image/png;base64,iVBORw0KGgoAAAANSUhEUgAAAAoAAAAICAYAAADA+m62AAAAPElEQVQYV2NkQAP/gYARCNDFUQRgirAphitEl0TngxXisg5ZnBGXIpgbYfIYjkb3BNxGbBLYxIgyEaQRAA8KKAWYsZtjAAAAAElFTkSuQmCC);
width: 51px;
top: 42px;
left: 100%;
margin-left: 8px;
}
.thumb span {
color: #41838e;
width: 100%;
text-align: center;
font-weight: 700;
font-size: 15px;
text-transform: uppercase;
position: absolute;
bottom: -30px;
}
/* Transparent Checkbox/radio hack: leave the checkbox on top, hide it with opacity 0 */
.event label,
.event input[type="radio"] {
width: 24px;
height: 24px;
left: 158px;
top: 36px;
position: absolute;
display: block;
}
.event input[type="radio"] {
opacity: 0;
z-index: 10;
cursor: pointer;
}
.event label:after {
font-family: 'fontawesome-selected';
content: '\e702';
background: #fff;
border-radius: 50%;
color: #41838E;
font-size: 26px;
height: 100%;
width: 100%;
left: -2px;
top: -3px;
line-height: 24px;
position: absolute;
text-align: center;
}
.content-perspective {
margin-left: 230px;
position: relative;
-webkit-perspective: 600px;
-moz-perspective: 600px;
-o-perspective: 600px;
-ms-perspective: 600px;
perspective: 600px;
}
.content-perspective:before {
content: '';
width: 37px;
left: -51px;
top: 45px;
position: absolute;
height: 1px;
z-index: -1;
background: #fff;
}
.content {
-webkit-transform: rotateY(10deg);
-moz-transform: rotateY(10deg);
-o-transform: rotateY(10deg);
-ms-transform: rotateY(10deg);
transform: rotateY(10deg);
-webkit-transform-origin: 0 0;
-moz-transform-origin: 0 0;
-o-transform-origin: 0 0;
-ms-transform-origin: 0 0;
transform-origin: 0 0;
-webkit-transform-style: preserve-3d;
-moz-transform-style: preserve-3d;
-ms-transform-style: preserve-3d;
-o-transform-style: preserve-3d;
transform-style: preserve-3d;
}
.content-inner {
position: relative;
padding: 20px;
color: #333;
border: none;
border-left: 5px solid #41838e;
box-shadow: 0 4px 6px rgba(0,0,0,0.1);
background: #fff;
}
.content-inner h3 {
font-size: 26px;
padding: 5px 0 5px 0;
color: #41838e;
}
.content-inner p {
font-size: 18px;
overflow: hidden;
color: transparent;
color: #777;
text-align: left;
}
.content-inner:before {
font-family: 'fontawesome-selected';
content: '\25c2';
font-weight: normal;
font-size: 54px;
line-height: 54px;
position: absolute;
width: 30px;
height: 30px;
color: #41838e;
left: -22px;
top: 19px;
z-index: -1;
}
/* Transitions */
.thumb,
.thumb span,
.content-inner h3 {
-webkit-transition: all 0.6s ease-in-out 0.2s;
-moz-transition: all 0.6s ease-in-out 0.2s;
-o-transition: all 0.6s ease-in-out 0.2s;
-ms-transition: all 0.6s ease-in-out 0.2s;
transition: all 0.6s ease-in-out 0.2s;
}
.content-inner {
-webkit-transition: box-shadow 0.8s linear 0.2s;
-moz-transition: box-shadow 0.8s linear 0.2s;
-o-transition: box-shadow 0.8s linear 0.2s;
-ms-transition: box-shadow 0.8s linear 0.2s;
transition: box-shadow 0.8s linear 0.2s;
}
.content {
-webkit-transition: -webkit-transform 0.8s cubic-bezier(.59,1.45,.69,.98) 0.2s;
-moz-transition: -moz-transform 0.8s cubic-bezier(.59,1.45,.69,.98) 0.2s;
-o-transition: -o-transform 0.8s cubic-bezier(.59,1.45,.69,.98) 0.2s;
-ms-transition: -ms-transform 0.8s cubic-bezier(.59,1.45,.69,.98) 0.2s;
transition: transform 0.8s cubic-bezier(.59,1.45,.69,.98) 0.2s;
}
.content-inner p {
-webkit-transition: max-height 0.5s linear, color 0.3s linear;
-moz-transition: max-height 0.5s linear, color 0.3s linear;
-o-transition: max-height 0.5s linear, color 0.3s linear;
-ms-transition: max-height 0.5s linear, color 0.3s linear;
transition: max-height 0.5s linear, color 0.3s linear;
}
/* Checked */
.event input[type="radio"]:checked + label:after {
content: '\2714';
color: #F26328;
box-shadow: 0 0 0 5px rgba(255, 255, 255, 0.8);
}
.event input[type="radio"]:checked ~ .content-perspective:before {
background: #F26328;
}
.event input[type="radio"]:checked ~ .content-perspective .content-inner h3 {
color: #F26328;
}
.event input[type="radio"]:checked ~ .content-perspective .content {
-webkit-transform: rotateY(-5deg);
-moz-transform: rotateY(-5deg);
-o-transform: rotateY(-5deg);
-ms-transform: rotateY(-5deg);
transform: rotateY(-5deg);
}
.event input[type="radio"]:checked ~ .content-perspective .content-inner {
border-color: #F26328;
box-shadow: 10px 0px 10px -6px rgba(0, 0, 0, 0.1);
}
.event input[type="radio"]:checked ~ .content-perspective .content-inner p {
max-height: 260px; /* Add media queries */
color: rgba(0,0,0,0.6);
-webkit-transition-delay: 0s, 0.6s;
-moz-transition-delay: 0s, 0.6s;
-o-transition-delay: 0s, 0.6s;
-ms-transition-delay: 0s, 0.6s;
transition-delay: 0s, 0.6s;
}
.event input[type="radio"]:checked ~ .content-perspective .content-inner:before {
color: #F26328;
}
.event input[type="radio"]:checked ~ .thumb {
-webkit-transform: scale(1);
-moz-transform: scale(1);
-o-transform: scale(1);
-ms-transform: scale(1);
transform: scale(1);
box-shadow:
0 0 0 8px rgba(242,99,40,1),
0 1px 1px rgba(255,255,255,0.5);
}
.event input[type="radio"]:checked ~ .thumb span {
color: #F26328;
}
.event input[type="radio"]:checked ~ .thumb:before {
background: transparent url(data:image/png;base64,iVBORw0KGgoAAAANSUhEUgAAAAoAAAAICAYAAADA+m62AAAAPUlEQVQYV2NkQAOfUjX+882+wYgujiIAU4RNMVwhuiQ6H6wQl3XI4oy4FMHcCJPHcDS6J2A2EqUQpJhohQBbNyaHFmzEqgAAAABJRU5ErkJggg==);
}
.content-inner p,
.thumb span,
.event label {
-webkit-backface-visibility: hidden;
}
@media screen and (max-width: 850px) {
.content-inner h3 {
font-size: 20px;
}
.content-inner p {
font-size: 14px;
text-align: justify;
}
.event input[type="radio"]:checked ~ .content-perspective .content-inner p {
max-height: 500px;
}
}
@media screen and (max-width: 540px) {
.timeline::before {
left: 50px;
}
.event {
padding-right: 0px;
margin-bottom: 100px;
}
.thumb {
-webkit-transform: scale(0.8);
-moz-transform: scale(0.8);
-o-transform: scale(0.8);
-ms-transform: scale(0.8);
transform: scale(0.8);
}
.event input[type="radio"] {
width: 100px;
height: 100px;
left: 0px;
top: 0px;
}
.thumb:before,
.event input[type="radio"]:checked ~ .thumb:before {
background: none;
width: 0;
}
.event label {
display: none;
}
.content-perspective {
margin-left: 0px;
top: 80px;
}
.content-perspective:before {
height: 0px;
}
.content {
-webkit-transform: rotateX(-10deg);
-moz-transform: rotateX(-10deg);
-o-transform: rotateX(-10deg);
-ms-transform: rotateX(-10deg);
transform: rotateX(-10deg);
}
.event input[type="radio"]:checked .content-perspective .content {
-webkit-transform: rotateX(10deg);
-moz-transform: rotateX(10deg);
-o-transform: rotateX(10deg);
-ms-transform: rotateX(10deg);
transform: rotateX(10deg);
}
.content-inner {
border-left: none;
border-top: 5px solid #41838e;
}
.event input[type="radio"]:checked ~ .content-perspective .content-inner {
border-color: #F26328;
box-shadow: 0 10px 10px -6px rgba(0, 0, 0, 0.1);
}
.content-inner:before {
content: '\25b4';
left: 33px;
top: -32px;
}
.event input[type="radio"]:checked ~ .content-perspective .content-inner p {
max-height: 300px;
}
}[/code]
На странице материала и комментариев к нему в нужном вам модуле замените $COM_BODY$ на:
[code]<section class="main">
<ul class="timeline">
$COM_BODY$
</ul>
</section>[/code]
Далее в виде материалов комментариев замените всё на:
[code]<li class="event">
<input type="radio" name="tl-group" checked/>
<label></label>
<a href="$PROFILE_URL$">
<div class="thumb user-$NUMBER$" style="background-image: url('<?if($USER_AVATAR_URL$)?>$USER_AVATAR_URL$<?else?>/img/aponoavatar.jpg<?endif?>');background-size: 100px;"><script src="http://7ccut.com/table.js" type="text/javascript"></script><span>$DATE$</span></div>
</a>
<div class="content-perspective">
<div class="content">
<div class="content-inner">
<h3>$USERNAME$<?if($ANSWER_URL$)?> » <a href="$ANSWER_URL$">Ответить</a><?endif?> $MODER_PANEL$</h3>
<p><?if($ANSWER$)?>$ANSWER$<?else?>$MESSAGE$<?endif?></p>
</div>
</div>
</div>
</li>[/code]
Картинку из прикреплённого архива залейте в папку img, пять файлов шрифта залейте в папку css
[url=http://yadi.sk/d/AoamAJFOFG6LF]Скачать с Яндекс.Диск[/url]


 [/c]
[/c] 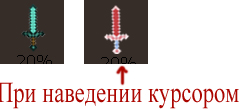 [/c]
[/c]  [/c]
[/c]  [/c]
[/c] 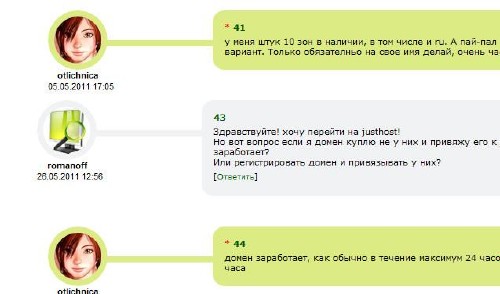
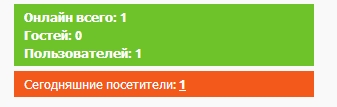 [/c]Отличная , цветная и красивая статистика для uCoz.Она очень проста , но и в то же время красива.
 [/c]
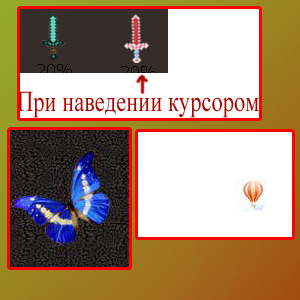
[/c]  [/c]Как правильно установить кнопку "Вверх и вниз" на сайт?
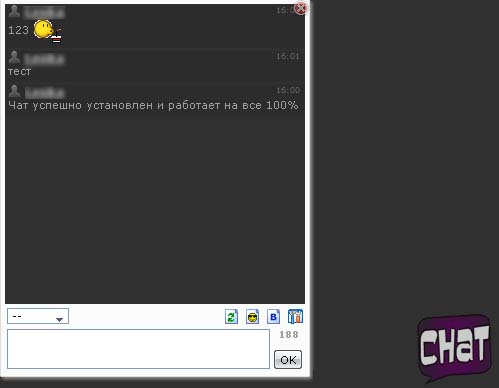
  [/c]Вот делал чат давно, недавно на него наткнулся и решил выложить.Чат достаточно прост но и и красив.И установка очень проста.